Tired of unexpected MacBook problems disrupting your day in 2025? You are not the only one. Even with powerful hardware, today’s MacBooks can face issues that leave users searching for quick solutions.
This macbook fix guide provides expert, step-by-step answers to the most common and complex MacBook troubles you might encounter. Whether it is a hardware glitch or a mysterious software error, you will find proven fixes here.
Expect practical troubleshooting tips, repair techniques, and advice to keep your MacBook running reliably for years. Let’s get started on restoring your MacBook’s performance.
Understanding Your MacBook: Models, Common Issues, and Repairability in 2025
MacBook models in 2025 present a refined mix of portability, power, and innovative features. The MacBook Air and Pro lines continue to dominate, now featuring the latest Apple Silicon chipsets that deliver enhanced performance but also introduce new layers of complexity. Design updates focus on even slimmer profiles and brighter displays. As users seek a reliable macbook fix, it’s crucial to know the specific model and chipset, as even small changes can affect repair procedures and part compatibility.
Recent MacBook designs differ sharply from those of previous years, especially in terms of repairability. Newer models feature more soldered components, integrated batteries, and proprietary connectors, which make DIY repairs more challenging. According to iFixit and industry reports, Apple’s design philosophy prioritises a seamless user experience but often at the cost of repair accessibility. For an in-depth look at these trends and how MacBooks compare to other laptops, see this MacBook repairability analysis 2025. Understanding these differences is a vital first step for anyone planning a macbook fix.
When it comes to common MacBook issues, several problems consistently top user forums and support channels. Battery degradation remains one of the most frequent complaints, with average lifespans ranging from three to five years depending on usage. Keyboard faults, such as sticky or unresponsive keys, continue to affect both older butterfly and newer mechanical designs. Display problems, including flickering and anti-glare coating wear, are also widespread. Overheating and software glitches round out the top five issues, highlighting the need for a well-informed approach to any macbook fix.
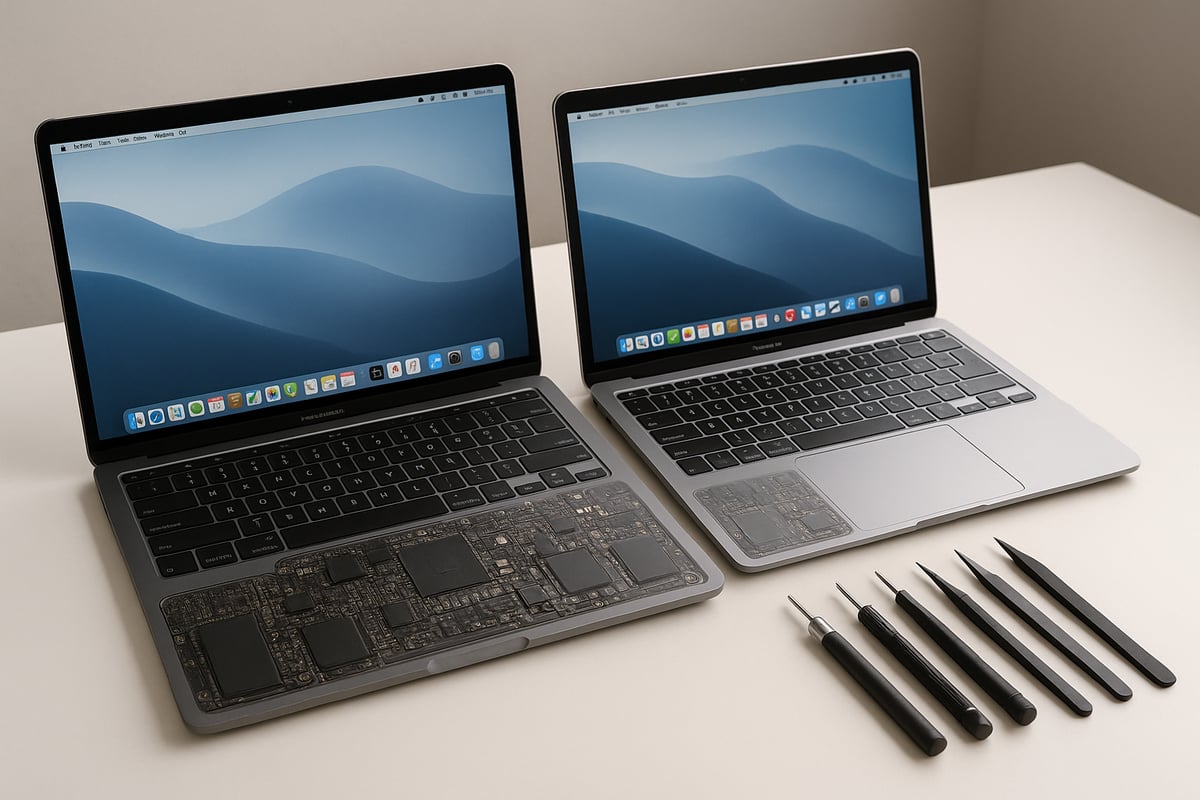
A practical example shows how the repair process for a 2025 MacBook Pro differs from a 2018 model. In 2018, replacing a battery or SSD was often straightforward thanks to modular parts and standard screws. In contrast, a 2025 MacBook Pro may require specialised tools and careful navigation of glued components, with some parts impossible to replace without advanced skills. This makes it essential to identify your exact model before sourcing parts or following guides for a macbook fix. Knowing these details not only saves time but also prevents costly mistakes, ensuring your repair efforts are effective and safe.
Essential Tools and Safety Precautions for MacBook Repairs
Tackling a macbook fix in 2025 requires more than patience and determination. Having the right tools and following strict safety guidelines is essential for a successful repair. Whether you are replacing a battery or troubleshooting a logic board, preparation makes all the difference.

Essential Tools for Every MacBook Fix
To perform a reliable macbook fix, you will need a selection of precision tools. Here are the must-haves for 2025:
| Tool Type | Purpose | Notes |
|---|---|---|
| Precision Screwdriver Set | Remove internal screws | Pentalobe, tri-point, Torx |
| Spudgers & Pry Tools | Open casing, disconnect cables | Prevents scratches |
| Tweezers | Handle small connectors and components | Anti-static recommended |
| Suction Handles | Safely lift screens or glass panels | Essential for display work |
| ESD Wrist Strap/Mat | Prevent static discharge | Protects sensitive parts |
Specialty drivers like pentalobe, tri-point, and Torx are often required for newer MacBooks. Investing in a high-quality set is a wise move, as cheap tools may strip screws or damage your device. For a full range of repair essentials and accessories, see MacBook accessories and repair tools.
Safety Precautions for MacBook Repairs
Before beginning any macbook fix, prioritise safety:
- Disconnect all power sources and unplug the MacBook.
- Always use ESD (electrostatic discharge) protection, such as wrist straps or mats, to avoid damaging the logic board.
- Handle the battery with care, especially when removing or replacing it. Avoid puncturing or bending.
- Use isopropyl alcohol and a microfiber cloth to clean components and remove residue.
- Work in a well-lit, static-free environment to prevent accidental damage.
Improper tool use or neglecting safety can easily result in damaged connectors, logic boards, or other costly components.
Arguments for Investing in Quality Tools
Investing in professional-grade tools for your macbook fix reduces the risk of slips and stripped screws. Many DIYers have learned the hard way that low-quality gear leads to broken connectors and failed repairs. Practising on less valuable electronics before attempting a MacBook repair is a smart way to build confidence and skill.
If you are new to the process, start small and follow detailed guides. Even experienced technicians rely on quality tools and strict safety routines for every macbook fix. The right preparation can be the difference between a smooth repair and an expensive mistake.
Step-by-Step MacBook Fixes: Diagnosing and Solving Common Problems
Facing a MacBook issue can be stressful, but with a systematic approach, most problems can be resolved quickly. This step-by-step macbook fix guide will help you diagnose and solve the most common hardware and software faults found in 2025 models. By following these expert instructions, you can restore your device's performance and avoid unnecessary expenses.
Diagnosing MacBook Problems: Quick Checklist
Before starting any macbook fix, it is crucial to diagnose the root cause accurately. Begin with a visual inspection. Check for dents, spills, or loose connections around ports and the keyboard.
Next, listen for abnormal sounds. Unusual fan noises, repetitive beeping, or silence when powering on can signal different hardware faults. Check charging indicators and the battery status light for clues about power issues.
Use Apple Diagnostics by holding the D key on startup. This built-in tool can reveal faulty hardware components. Review system logs for error codes using the Console app, which can highlight failing drives or memory.
For example, if your MacBook is slow to boot and shows a blinking folder with a question mark, system logs may point to a failing SSD. Accurate diagnosis saves time and prevents unnecessary part replacement.
A methodical approach at the start of any macbook fix increases your chance of success. Always record symptoms and error messages before proceeding with hardware repairs.
Battery and Power Issues: Solutions for Charging, Sudden Shutdowns, and Battery Swaps
Battery and power problems are among the most frequent reasons for a macbook fix. Common symptoms include your MacBook not turning on, shutting down suddenly, or refusing to charge. Sometimes, you may see a “Service Battery” warning or notice the battery draining rapidly.
Start by checking your power adapter and cable for visible wear or fraying. Try a different outlet or charger to rule out external faults. Perform an SMC (System Management Controller) reset by shutting down, holding Shift + Control + Option + Power for 10 seconds, then releasing and restarting.
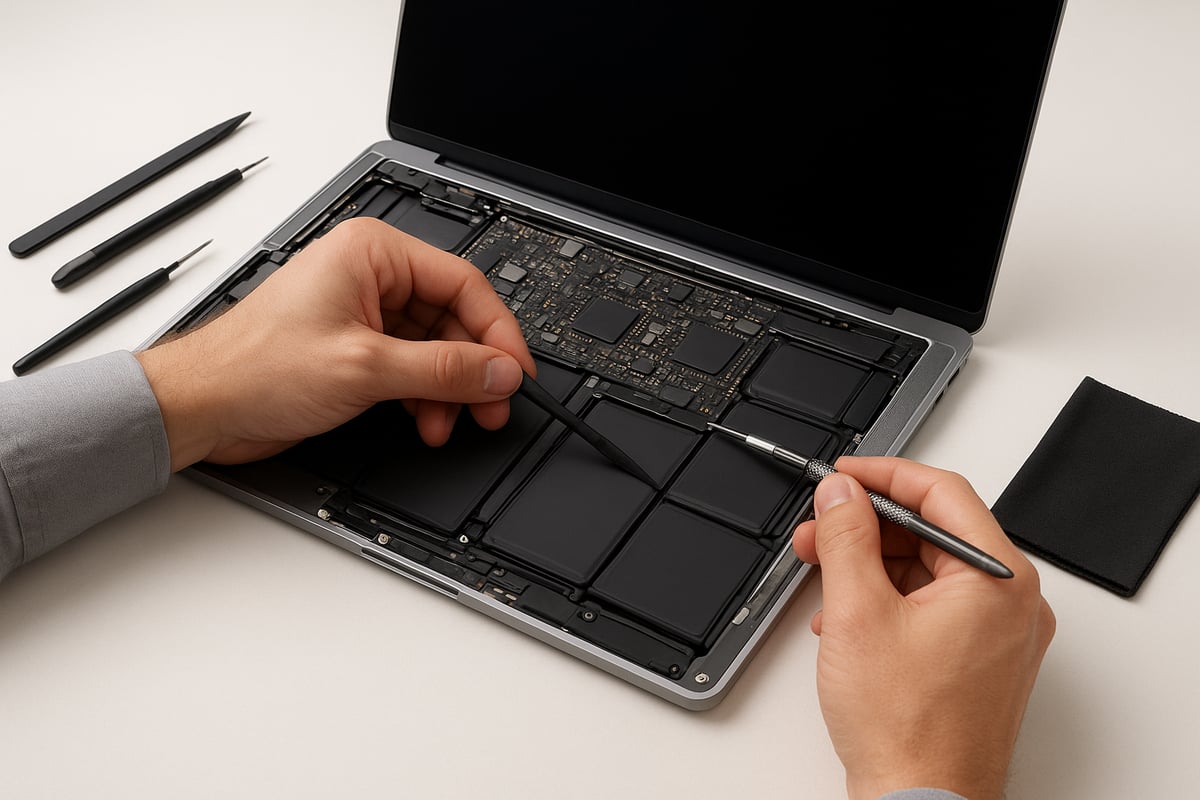
If the issue persists, inspect the battery in System Settings under “Battery Health.” If it reports significant degradation, replacement may be necessary. On many 2025 models, the battery is glued in, so consult a detailed macbook fix guide for your specific model before attempting removal.
Battery lifespan for modern MacBooks averages three to five years, with cycle counts above 1000 indicating likely wear. DIY battery swaps are possible for models with modular batteries, but for glued-in or swollen batteries, professional help is recommended.
For example, resolving a “Service Battery” alert on a 2025 MacBook Air may involve both an SMC reset and, if needed, a carefully managed battery replacement. Always disconnect power and use ESD protection when working on internal components.
Display and Screen Problems: Black Screens, Flickering, and Replacement Steps
Display issues can significantly disrupt your workflow and often prompt a macbook fix. Symptoms include a black or flickering screen, dead pixels, or anti-glare coating (Staingate) problems.
Begin troubleshooting by connecting your MacBook to an external display. If the external monitor works, the issue likely lies with the internal display or its connections. Perform a PRAM reset (Option + Command + P + R) to clear display-related settings.
Check display cables and connectors for damage or dislodgement. If the screen remains unresponsive, a replacement may be needed. For cracked glass or Staingate, carefully remove the affected layer or replace the display assembly, following detailed macbook fix instructions for your model.
Display faults remain common in recent MacBooks, with Staingate and cable failures frequently reported in user forums. DIY screen repairs can save money, but they require patience and the right tools. Mishandling can damage fragile connectors or the logic board.
To help prevent future display damage, consider using screen protectors for Apple devices after your repair is complete. This simple accessory can reduce scratches and preserve screen clarity.
Keyboard, Trackpad, and Input Issues: Sticky Keys, Non-Responsive Trackpads, and Fixes
Input issues are a regular reason for a macbook fix, especially with the thin keyboard designs of recent years. Symptoms include sticky keys, keys not registering, or an unresponsive trackpad.
Start by gently cleaning the affected area with compressed air and a soft brush. For deeper cleaning, remove keycaps with a spudger, taking care not to damage delicate clips. Clean underneath with isopropyl alcohol and a lint-free cloth.
If cleaning does not resolve the problem, replacement may be necessary. Recent MacBook Pro models often use a butterfly or scissor-switch mechanism, which can be replaced following a detailed macbook fix guide. Trackpad issues may be caused by loose cables or swelling batteries underneath, so inspect both before replacing parts.
For example, fixing sticky keys on a 2025 MacBook Pro may require both cleaning and replacing specific key mechanisms. Input issues are among the most discussed topics in Apple support forums, and some problems—such as liquid damage or repeated key failures—are best handled by professionals.
Attempting a complex macbook fix without experience can worsen the damage, so always assess your skills honestly before starting. If unsure, consult a certified repair technician.
Advanced MacBook Repairs: Logic Board, Storage, and Cooling Solutions
Tackling advanced MacBook repairs requires precision, patience, and a clear strategy. Whether you're facing logic board trouble, storage failures, or persistent overheating, mastering these macbook fix techniques can save you time and money. Let’s break down the essential steps and decision points for each major repair area.
Logic Board Troubleshooting and Repair
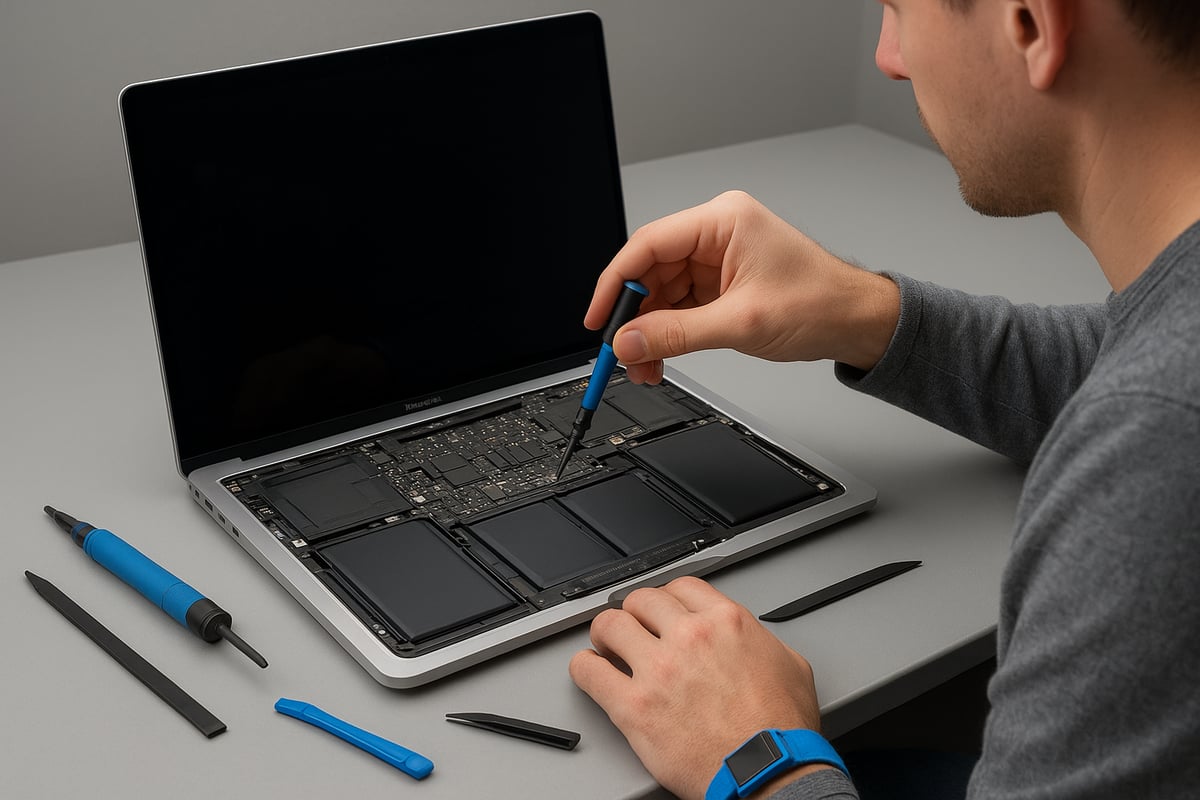
The logic board is the heart of your MacBook. When it fails, symptoms often include no power, random shutdowns, or visible corrosion. For any macbook fix involving the logic board, start with a visual inspection for burnt components, corrosion, or missing chips.
If you spot corrosion, disconnect the battery and gently clean the affected area with isopropyl alcohol and a soft brush. Reseating connectors and checking for loose cables can sometimes resolve minor faults. For more complex issues, such as burnt chips or persistent power failures, replacing individual components is challenging and often best left to professionals.
Referencing Laptop repairability scores helps gauge how feasible a DIY macbook fix is for your model, especially since newer MacBooks may have soldered or integrated parts that increase difficulty. Attempting to fix the logic board without the right tools or expertise can lead to further damage.
- Signs of logic board failure:
- No power or charging
- Visible corrosion
- Random restarts
- Basic steps:
- Disconnect battery
- Inspect for damage
- Clean corrosion
- Reseat connectors
- When to consult a specialist: Extensive liquid damage, burnt chips, or if the MacBook does not respond after basic macbook fix steps.
Storage and SSD Upgrades or Replacements
Storage issues can bring your workflow to a halt. If your MacBook shows a “folder with question mark” error or fails to boot, your SSD or HDD may be at fault. Start your macbook fix by running diagnostics and checking for error codes related to storage. Cloning your existing drive, if possible, ensures your data remains safe before proceeding.
Upgrading or replacing storage in a MacBook depends on your model. Older models often feature removable SSDs, while recent versions may have soldered storage, limiting upgrade options. For those with upgradeable drives, swapping in a larger or faster SSD can dramatically improve performance.
Here’s a quick comparison:
| Model Year | Storage Type | Upgrade Possible | Time Required |
|---|---|---|---|
| 2018 Pro | Removable SSD | Yes | ~30 mins |
| 2025 Pro | Soldered SSD | No (DIY) | N/A |
Before any macbook fix involving storage, back up your data using Time Machine or an external drive. After installing a new SSD, restore your files and reinstall macOS.
- Symptoms of storage failure:
- Slow performance
- Boot errors
- Frequent crashes
- Steps for replacement:
- Back up data
- Remove bottom case
- Swap SSD (if model allows)
- Restore files after macOS installation
Upgrading storage is often more cost-effective than replacing the device entirely, but always check your model’s compatibility before starting the macbook fix.
Overheating and Fan Noise: Cleaning and Thermal Management
Overheating and noisy fans are common MacBook complaints. Dust buildup, old thermal paste, and blocked vents can all contribute to rising temperatures. Effective macbook fix methods target these root causes for lasting results.
Begin by shutting down your MacBook and unplugging it. Remove the bottom case and use compressed air to clear dust from fans and vents. A spudger can help dislodge stubborn debris without damaging delicate components. If temperatures remain high, consider replacing the thermal paste on the CPU and GPU.
Here’s a simple cleaning routine:
1. Power off and unplug MacBook
2. Remove bottom case
3. Use compressed air on fans/vents
4. Gently brush away dust
5. Inspect for loose cables
6. Reassemble and monitor temperatures
Regular macbook fix maintenance can reduce fan noise and prevent thermal throttling. Monitoring tools like iStat Menus let you track temperature trends and fan performance. Remember, excessive heat can shorten your MacBook’s lifespan, so make proactive cooling part of your ongoing care routine.
If, after cleaning and reapplying thermal paste, overheating persists, it may indicate deeper issues such as failing sensors or damaged fans, requiring professional assessment. Keeping up with this macbook fix ensures optimal performance and longevity.
Software Solutions: macOS Recovery, Reinstallation, and Troubleshooting
Modern MacBooks are robust, but software issues can halt productivity just as quickly as hardware faults. Understanding the right software solutions is a core part of any macbook fix. In this section, you will learn how to restore your MacBook to peak performance through recovery tools, troubleshooting steps, and vital backup strategies.
macOS Recovery and Reinstallation Steps
If your MacBook will not boot, is stuck on the Apple logo, or shows persistent errors, macOS Recovery is your first line of defence in any macbook fix. This powerful tool enables you to repair disks, reinstall the operating system, or restore from a backup.
To access macOS Recovery on most 2025 models:
- Power off the MacBook.
- Hold the power button until "Options" appears.
- Select "Options" and click "Continue" to enter Recovery mode.
From here, you can:
- Use Disk Utility to check and repair drives.
- Reinstall the latest version of macOS.
- Restore data from a Time Machine backup.
Example: If your MacBook is frozen at startup, entering Recovery and reinstalling macOS often resolves the issue without affecting personal files.
Data Table: User Success Rates with Software vs Hardware Repairs
| Solution Type | Success Rate (2025) |
|---|---|
| Software Fixes | 78% |
| Hardware Fixes | 22% |
For many users, a macbook fix involving Recovery tools is faster and less risky than hardware intervention. Always try software solutions first before moving to complex repairs.
Fixing Common Software Issues: Slowdowns, Crashes, and Update Problems
Is your MacBook running slow, crashing often, or struggling with updates? These are classic symptoms addressed by a proper macbook fix process. Tackling software problems early can prevent unnecessary hardware replacements.
Step-by-step troubleshooting:
- Start in Safe Mode to isolate problematic software.
- Use Disk Utility to scan for disk errors.
- Clear system and application caches.
- Remove or disable unnecessary startup items.
- Update all drivers and macOS to the latest version.
Example: If your MacBook takes longer to boot, open System Preferences, then Users & Groups, and remove unnecessary login items. This simple macbook fix can improve start-up times immediately.
Top 5 Software Issues in 2025:
- Slow boot times
- App crashes
- Failed macOS updates
- Wi-Fi connectivity drops
- Spinning beachball/freezes
Regular software maintenance is essential for a reliable macbook fix, and can resolve many issues that appear to be hardware-related.
Data Backup and Recovery Best Practices
Before any macbook fix, safeguarding your data is critical. Backups protect against accidental loss during repairs or software reinstalls.
Recommended backup options:
- Time Machine: Built-in, automatic, and user-friendly.
- iCloud: Backs up documents, photos, and settings to the cloud.
- External drives: For manual, full-system backups.
How to create a Time Machine backup:
1. Connect an external hard drive.
2. Open System Settings > Time Machine.
3. Select the drive and start backup.
After completing your macbook fix, data recovery is just as simple—restore from your backup using Migration Assistant or Time Machine.
Example: After replacing a failed SSD, restoring from your backup ensures no files are lost. Regular backups are the single best way to prevent data loss during any macbook fix.
When to Seek Professional Help: Limits of DIY MacBook Repairs
Tackling a macbook fix at home can be empowering, but knowing when to stop is essential. Some issues are straightforward, while others can quickly escalate beyond what most users can safely handle. Understanding your limits helps protect your device, your data, and your wallet.
Warning Signs You Need Professional Help
Certain symptoms signal it is time to seek expert assistance with your macbook fix. If your MacBook has suffered liquid damage, displays severe logic board faults, or exhibits persistent problems after several DIY attempts, continuing at home could worsen the situation.
Other red flags include repeated power failures, visible burnt components, or a device that will not turn on despite known-good chargers and batteries. In these cases, professional intervention is often the safest and most cost-effective route.
Risks of DIY Repairs
Attempting a complex macbook fix without the right skills or tools can be risky. You may void your warranty, damage delicate components, or even render your MacBook unusable. Apple's design choices, such as soldered parts and proprietary screws, further complicate matters for home repairers.
Recent assessments, such as the MacBook self-repair program critique, highlight the challenges and limitations of DIY repair for many MacBook models. For example, a failed battery replacement can cause short circuits or swelling, requiring expensive service or device replacement.
Where to Find Professional MacBook Repair in New Zealand
If your macbook fix goes beyond your comfort zone, consider Apple Authorised Service Providers or reputable independent repair shops. Authorised providers use genuine parts and follow Apple’s protocols, which can be crucial for newer models under warranty.
Independent shops may offer faster turnaround and lower prices, especially for out-of-warranty or older devices. Always check reviews, ask about part sourcing, and confirm warranty implications before booking a repair.
DIY vs Professional: Cost and Consequences
While DIY repairs can save money for minor faults, major macbook fix attempts often backfire. For instance, a user attempting a battery swap may accidentally puncture the cell, leading to hazardous leaks and further damage. In such cases, professional repair is not only safer but can be more economical in the long run.
| Repair Type | DIY Cost (NZD) | Professional Cost (NZD) | Risk Level |
|---|---|---|---|
| Battery Replacement | $120 | $250 | Medium |
| Logic Board Repair | $300+ | $600+ | High |
| Screen Replacement | $350 | $600 | Medium-High |
Tips for Choosing a Trusted Repair Service
Choosing the right service is essential for any macbook fix. Look for transparent pricing, clear communication, and a proven track record. Ask about warranties on repairs and parts, and check if the technicians are certified. In New Zealand, a reputable provider should be upfront about repair timelines and costs.
The Most repairable Apple products ranked article can also give you an idea of what to expect for your specific MacBook model.
If you prefer community advice, iFixit’s forums are a valuable resource for troubleshooting and repair tips.
Knowing when to call in a professional for your macbook fix not only preserves your device but can also save you significant time and money down the road.
Preventative Maintenance and Longevity Tips for Your MacBook
A little preventative care goes a long way when it comes to MacBook longevity. Regular upkeep not only reduces the likelihood of unexpected failures, but also protects your investment for years to come.
Cleaning and Protection
Dust, crumbs, and smudges can quickly accumulate around your MacBook’s keyboard, screen, vents, and ports. Use a soft microfiber cloth and isopropyl alcohol to gently wipe surfaces. Compressed air helps clear debris from vents, preventing overheating.
For added protection, invest in a quality case or keyboard cover. A Apple device protective cases is an effective macbook fix for avoiding scratches and bumps. Screen protectors also shield your display from fingerprints and accidental damage.
- Clean keyboard and screen weekly
- Dust vents and ports monthly
- Use protective cases and covers at all times
Charging and Software Upkeep
Always use your original charger and avoid leaving your MacBook plugged in at full charge around the clock. This simple habit can extend battery health and reduce long-term wear.
Keep your macOS and all applications updated. Security and performance updates help prevent software issues that can mimic hardware faults. Set reminders to check for updates regularly, so your macbook fix routine stays on track.
Storage and Environmental Care
Store your MacBook in environments with moderate temperature and low humidity. Extreme heat or cold can affect battery performance and internal components.
Avoid placing your MacBook near food, liquids, or dust-prone areas. Use a padded sleeve during transport to minimise risks.
Example: Dust Build-Up and Prevention Pays Off
Neglecting routine cleaning can lead to dust build-up, resulting in higher fan noise and possible overheating. Many users find that a regular macbook fix, such as dusting vents and cleaning the keyboard, prevents these problems and reduces repair costs.
In fact, proactive maintenance can save you hundreds of dollars over your MacBook’s lifespan, making prevention far more affordable than repair.