Is your iPhone losing power faster than ever? You are not alone. Many New Zealanders find themselves frustrated by battery problems in 2025, as even the latest models can suffer from performance drops over time.
This guide is designed to help you make informed decisions about iphone battery replacement. We will walk you through the crucial signs to look out for, explain the latest battery technologies, and provide step-by-step instructions for safe DIY replacements.
You will also discover cost comparisons, expert tips, and essential advice to restore your iPhone’s performance and save money.
Understanding iPhone Battery Health in 2025
The landscape of iphone battery replacement is changing rapidly for New Zealanders in 2025. If you want to keep your iPhone running at its best, understanding the latest battery technologies, health diagnostics, and replacement trends is essential. Let’s break down what’s new, how to spot battery issues, and when replacement is the right move.
Key Battery Technologies and Changes Since 2024
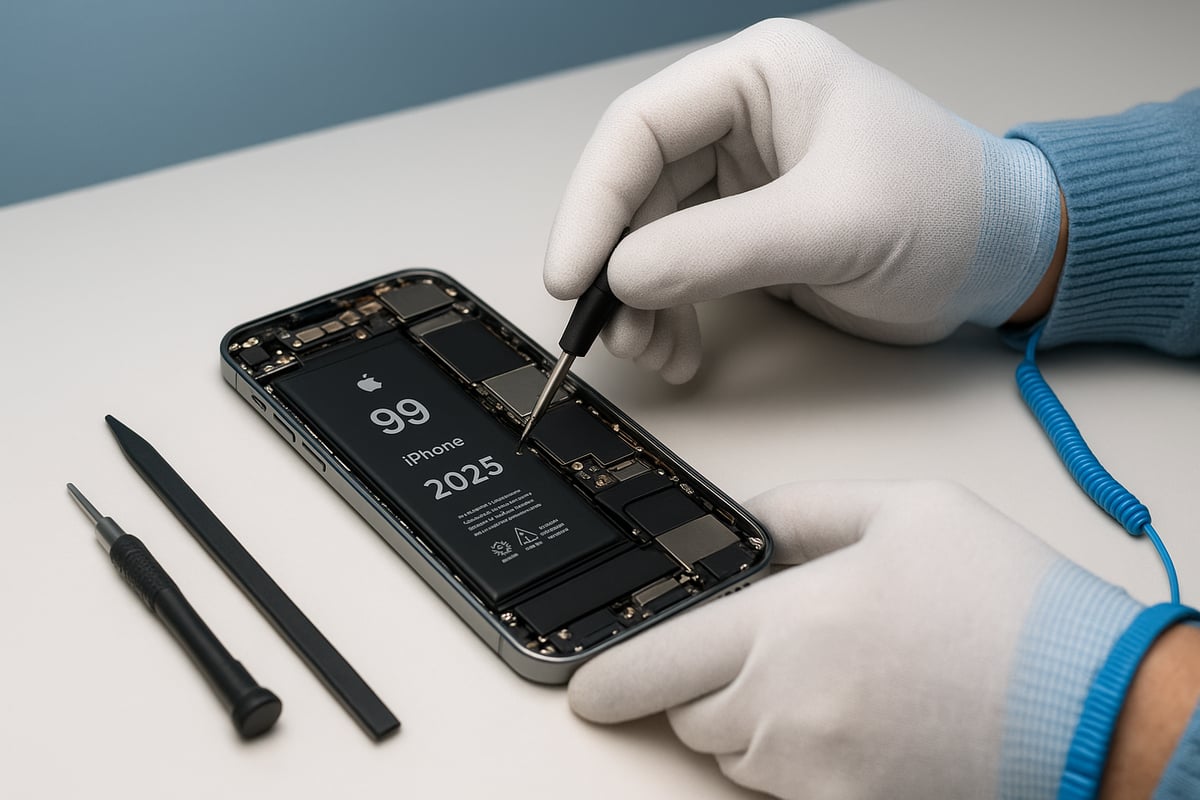
Apple’s lithium-ion batteries have steadily improved, and by 2025, the iphone battery replacement process is more user-friendly than ever. Recent iPhones, especially the iPhone 16 series, feature batteries designed for easier access and safer handling.
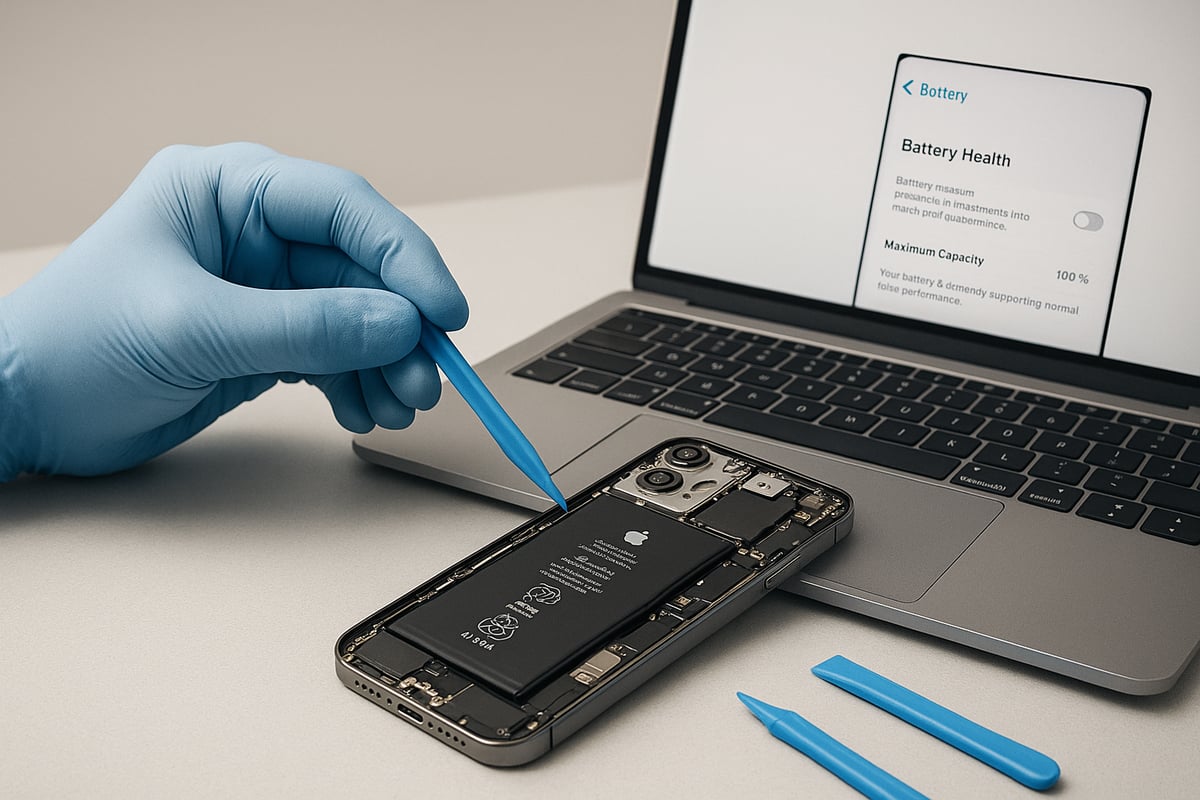
iOS 18 introduces enhanced battery health diagnostics. Users can now view detailed analytics such as cycle count, maximum capacity, and real-time performance metrics directly in Settings. This transparency helps you make informed decisions about iphone battery replacement and maintenance.
A major shift in the iPhone 14 to 16 series is the “open from the back” design, influenced by competitors and the global right to repair movement. This structure allows you to access the battery without removing the display, reducing the risk of damaging sensitive components. The iPhone 16 takes it further, using a new adhesive that debonds safely when an electrical current is applied. This makes the battery much easier to remove, lowering the barrier for DIY iphone battery replacement.
Here’s a quick overview of battery lifespan expectations for 2025:
| Model | Expected Charge Cycles | Capacity Retention (%) |
|---|---|---|
| iPhone 12–13 | 500+ | 80 |
| iPhone 14–15 | 600+ | 82 |
| iPhone 16 | 700+ | 85 |
For example, replacing the battery in an iPhone 16 is now a straightforward process compared to older models. The improvements in design and adhesive technology mean less risk and time for anyone considering iphone battery replacement.
Newer models not only simplify repairs but also support New Zealanders’ right to repair, making it easier to keep devices running longer and reduce electronic waste.
Signs Your iPhone Battery Needs Replacement
Recognising when it’s time for iphone battery replacement can help you avoid bigger issues down the line. Some common warning signs include:
- Rapid battery drain, even with moderate use
- Unexpected shutdowns, especially under load
- The device running hot or becoming uncomfortably warm
- Battery health dropping below 80% in iOS Settings
- Swollen battery symptoms, such as a lifting screen or warped case
- Charging problems, or the device not powering on
Consider the example of a user with an iPhone 13 Pro. After two years, they notice the battery lasts only four hours on a full charge, and iOS reports health at 78 percent. This is a clear signal for iphone battery replacement.
Ignoring these signs can have serious consequences. Swollen batteries can damage the screen or internal components, and persistent overheating may shorten the life of your phone. For an in-depth look at how batteries degrade over time and what to expect, check out the iPhone Battery Degradation Patterns.
Prompt action can save you from costly repairs or data loss, making regular battery health checks a smart habit for every iPhone owner.
When to Replace vs. Repair or Upgrade
Deciding between iphone battery replacement, repairing other parts, or upgrading to a new device depends on several factors. Here’s a quick cost-benefit summary:
- Battery replacement typically costs between $69 and $99 NZD out-of-warranty as of late 2024.
- Buying a new iPhone can set you back $1,300 NZD or more.
- Replacing the battery can extend your device’s life by one to two years, saving money and reducing electronic waste.
Environmentally, choosing iphone battery replacement over buying new supports sustainability. Repairing instead of replacing your iPhone reduces e-waste and lowers your carbon footprint.
Consider warranties as well. Apple’s 2025 battery warranty covers up to one year or until capacity drops below 80 percent. DIY replacements might void AppleCare, but third-party repair shops can offer their own guarantees.
In summary, evaluating the cost, environmental impact, and warranty status will help you decide if iphone battery replacement is your best option.
Preparing for iPhone Battery Replacement
Getting ready for an iphone battery replacement is crucial for a smooth, safe, and successful repair. Whether you are a first-time DIYer or experienced with device repairs, proper preparation reduces risks and helps protect your investment. Let us walk through the essential steps you need to take before opening up your iPhone.
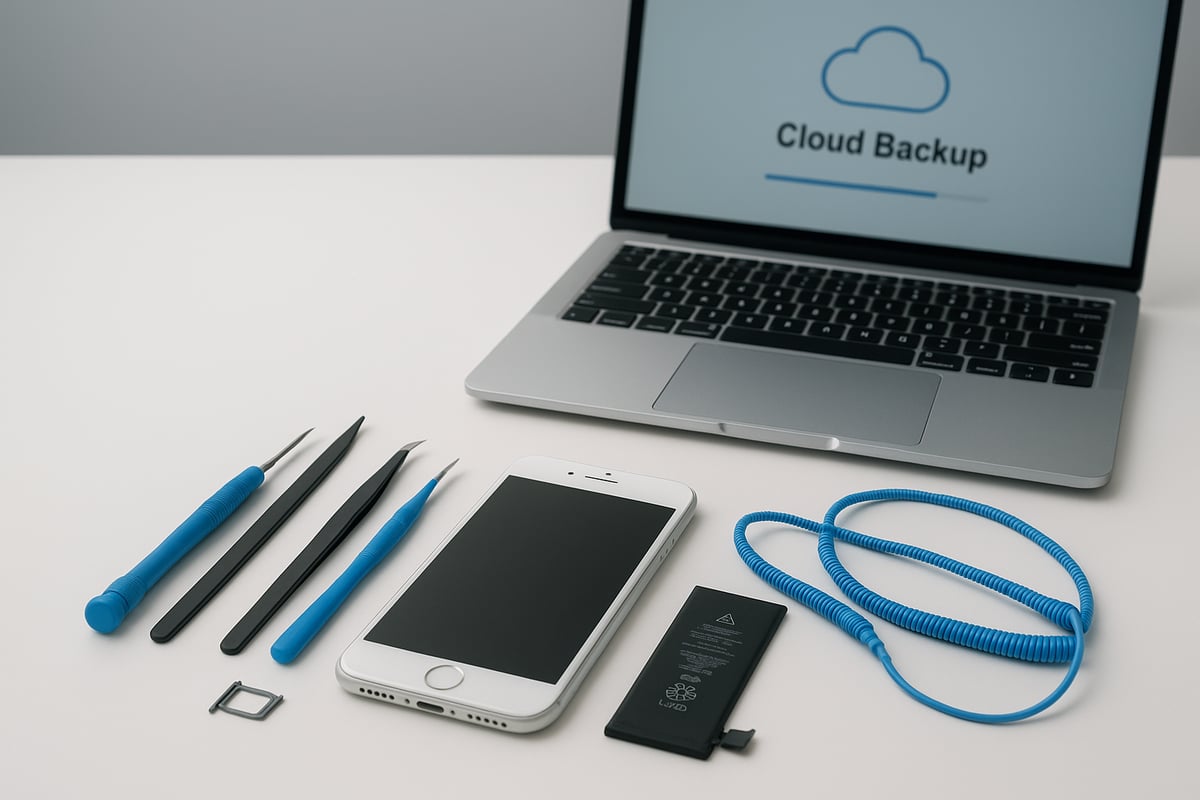
What You’ll Need: Tools, Parts, and Safety Gear
For a safe and effective iphone battery replacement, having the right tools and quality parts is non-negotiable. Here is what you will need:
- Pentalobe screwdriver (for iPhone screws)
- Plastic spudger (for prying open the device)
- Suction handle (helps separate the screen or back glass)
- Tweezers (for handling small connectors)
- Anti-static wrist strap (prevents static damage)
- Safety glasses (protects your eyes)
- Fireproof surface (for battery handling)
When sourcing a replacement battery, always choose genuine Apple parts or trusted third-party suppliers. Using low-quality batteries can lead to safety hazards and poor device performance. Kits from Apple Self Service Repair and iFixit often include most required tools, though you may need to add safety gear separately.
Before purchasing, confirm your iPhone’s model and battery compatibility. Use the iPhone model compatibility guide to ensure you select the correct replacement battery, which is critical for a successful iphone battery replacement.
By investing in the proper tools and quality parts, you minimise the risk of accidental damage and help maintain your warranty eligibility.
Backing Up and Securing Your Data
Before starting any iphone battery replacement, back up your data to prevent permanent loss. Data loss remains the top risk for DIY repairs if you skip this step.
Follow these steps:
- Back up your iPhone using iCloud or iTunes. Make sure the backup completes successfully.
- Disable Find My iPhone in Settings > [your name] > Find My > Find My iPhone.
- Log out of your Apple ID to prevent activation lock issues.
- Remove your SIM card and place it somewhere safe.
- Power off your iPhone completely. Aim to discharge the battery below 25% for safety.
These actions secure your personal information and reduce the risk of issues during the iphone battery replacement process. Remember, skipping a backup could mean losing precious photos, contacts, and app data if something goes wrong.
Take your time with this stage. It is better to spend a few extra minutes on backup than to risk losing important files.
Understanding Warranties and Repair Risks
Warranty coverage is an important consideration before attempting an iphone battery replacement. Apple’s battery warranty in 2025 covers defects for one year or until the battery drops below 80% capacity, whichever comes first.
Performing a DIY replacement can void your AppleCare or third-party warranty, especially if you damage components or use non-genuine parts. For example, some users have lost Face ID functionality after improper repairs, resulting in costly subsequent repairs.
DIY repairs offer savings and flexibility, but they come with risks. If you make a mistake during your iphone battery replacement, you could face extra costs or lose certain device features. Apple-authorised service centres provide warranty protection and professional expertise, though at a higher price.
Weigh the pros and cons carefully. If your device is still under warranty or you are not confident in your repair skills, professional service might be the smarter option.
Step-by-Step iPhone Battery Replacement Guide (2025 Models)
Replacing your iPhone battery in 2025 is more accessible than ever, thanks to design improvements and clearer diagnostics in iOS. Whether you are working on an iPhone 12 or the latest iPhone 16, following a careful process is essential for a safe and successful iphone battery replacement.
Step 1: Identifying Your iPhone Model and Battery Type
Before starting an iphone battery replacement, it is vital to confirm your iPhone model and the correct battery type. You can find your model number by navigating to Settings > General > About on your device. This information helps you source the right battery and tools for the job.
iPhone models from 12 through 16 each have unique battery sizes and connector layouts. For example, the iPhone 16 Plus and iPhone 16 Pro Max require different battery types, so always double-check compatibility. Using an incorrect battery can cause malfunctions or even damage the device.
Here is a quick reference table for recent models:
| Model | Battery Type | Year |
|---|---|---|
| iPhone 12/13 | Standard Li-ion | 2020-2021 |
| iPhone 14/15 | Advanced Li-ion | 2022-2023 |
| iPhone 16 | Repair-friendly Li-ion | 2024-2025 |
Ensuring the proper match at this stage sets the foundation for a safe iphone battery replacement process.
Step 2: Powering Down and Opening Your Device
Always begin by powering off your iPhone and discharging the battery below 25 percent. This reduces the risk of short circuits or thermal events during the iphone battery replacement.
Use a pentalobe screwdriver to remove the screws near the charging port. Depending on your model, the opening method will differ. For iPhone 14, 15, and 16, the device opens from the back, making battery access easier and reducing the chance of display damage. Older models (12 and 13 series) open from the front, so take extra care not to strain the display connectors.
Next, use a suction cup and spudger to gently separate the back glass or display. Work slowly around the edges, releasing clips and adhesive. If the back glass feels stuck, apply gentle, steady pressure rather than forcing it. This step is crucial for a smooth iphone battery replacement and helps prevent accidental cracks or cable tears.
Keep all screws and small parts organised in a tray or magnetic mat. Losing even a single screw can complicate reassembly.
Step 3: Disconnecting the Battery and Removing Adhesive
Once inside, locate the battery connector. Remove any shielding using a Phillips screwdriver or plastic tool, then carefully disconnect the battery. This halts power flow and ensures your safety during the iphone battery replacement.
Modern iPhones use adhesive strips to secure the battery. In iPhone 14 and 15 models, pull the black tabs gently to release the battery. For iPhone 16, Apple has introduced an electrical debonding system, making removal much simpler. If the adhesive tab breaks, gently warm the area or use a plastic card to lift the battery—never use metal tools, as this can puncture the cell.
Refer to Apple’s iPhone 16 Battery Repair Guide for model-specific instructions on handling the new debonding adhesive. Following these steps closely helps avoid damage to internal components.
Take your time. Rushing this step can result in torn connectors or a punctured battery, which are leading causes of repair failures.
Step 4: Installing the New Battery
With the old battery removed, align the new battery in the compartment. Make sure the connector lines up with the socket. Secure the new adhesive strips in place before connecting the battery. For iPhone 16 models, the new adhesive is colour-coded and activates with a gentle press or a brief electrical current, streamlining the iphone battery replacement process.
Reconnect the battery connector and replace the shield. Ensure all cables are routed properly to avoid pinching or crossing. If the model uses colour-coded connectors, match each one to its slot for a secure fit.
Press the battery gently into place. Verify there is no movement and that the battery sits flush with the case. Reinstall any brackets or shields removed earlier.
Before moving on, double-check that all connections are secure. A loose connector can prevent your iPhone from powering on after the iphone battery replacement.
Step 5: Reassembly and First Power-On
Carefully reseat the back glass or display, aligning it with the edges. Gently press down until clips engage, then reinsert and tighten the screws. Avoid over-tightening, which can crack the glass or damage threads.
Power on your iPhone. If the device does not start, check the battery connector and shield. Once powered up, run Apple diagnostics to confirm the new battery is detected and check the battery health status in Settings. Some iPhone models may display a “Non-Genuine Battery” warning if the battery is not paired through Apple diagnostics. This does not affect performance but may limit battery health visibility.
Calibrate the new battery by charging it to 100 percent, then allowing it to discharge completely before charging again. Apple recommends this step in 2025 to optimise battery health readings after an iphone battery replacement.
If you notice any issues—such as the device not powering on or battery health not updating—double-check your connections and review your steps.
Step 6: Post-Replacement Checklist and Troubleshooting
After a successful iphone battery replacement, verify that all device functions are working. Test Face ID or Touch ID, cameras, and sensors. Open the camera app and other system tools to check for error messages or non-responsive features.
If you encounter problems such as rapid battery drain, error messages, or the device not powering on, revisit the battery connection and shields. In some cases, reseating the battery or reconnecting display cables resolves these issues.
For persistent problems, consult community forums or Apple Support for troubleshooting tips. If Face ID or camera functions are not restored, seek professional help before further disassembly.
Remember, careful attention to each step and reviewing your work ensures a successful iphone battery replacement and helps extend your device’s lifespan.
iPhone Battery Replacement Costs in New Zealand (2025)
If you are considering iphone battery replacement in New Zealand, understanding the current costs is essential for making the right decision. In 2025, options range from official Apple-authorised service to third-party repair shops and DIY solutions. Each path comes with distinct pricing, benefits, and risks. Let us break down what you can expect to pay, what factors influence the final cost, and why battery replacement is both an economical and environmentally sound choice.
Official Apple vs. Third-Party and DIY Replacement Costs
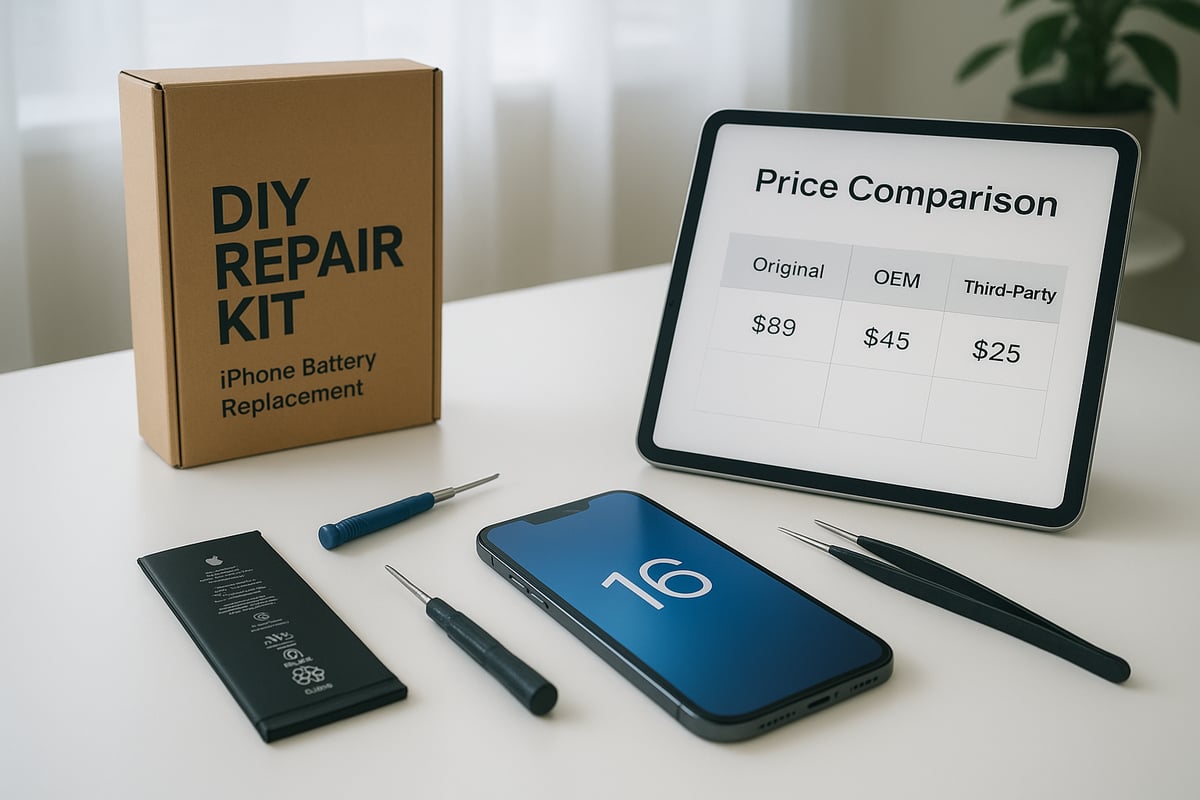
When it comes to iphone battery replacement, pricing depends on where you seek service. As of November 2024, Apple-authorised battery replacement for most iPhone models in New Zealand ranges from $69 to $99 NZD. For example, replacing the battery in an iPhone SE might cost $69, while a newer model like the iPhone 16 Pro Max could reach $99.
Third-party repair shops typically offer iphone battery replacement for $40 to $80 NZD, depending on the model and battery quality. DIY kits, such as those from iFixit, start at around $30 NZD and go up to $60 NZD. These kits often include tools and instructions, but you may need to supply additional items.
Below is a table summarising typical 2025 costs:
| Model | Apple Service | Third-Party | DIY Kit |
|---|---|---|---|
| iPhone SE | $69 | $40 | $30 |
| iPhone 11 | $79 | $55 | $38 |
| iPhone 13 | $89 | $65 | $45 |
| iPhone 15 | $99 | $80 | $55 |
| iPhone 16 | $99 | $80 | $60 |
Choosing the DIY route can save you up to $49 NZD compared to Apple service. For a step-by-step guide, refer to iFixit’s iPhone 15 Battery Replacement Guide, which outlines the process and required tools.
Factors Affecting Price and Value
Several factors influence the cost and value of an iphone battery replacement. First, the age of your device matters: older models may have cheaper batteries, but availability can be limited. The quality of the replacement battery is crucial—original equipment manufacturer (OEM) parts tend to cost more, while aftermarket options are less expensive but may not last as long.
Consider what is included in the price. Apple and some third-party providers offer warranties on parts and labour, while DIY kits may only cover the battery itself. Tools, instructions, and support can also affect the overall value.
When weighing your options, think about convenience and risk. Professional services reduce the chances of accidental damage, but DIY methods offer significant savings. Evaluate your technical skills and willingness to troubleshoot if issues arise during the iphone battery replacement process.
Environmental and Economic Benefits of Replacement
Opting for iphone battery replacement instead of a full device upgrade offers both environmental and economic advantages. Extending your phone’s life by one to two years helps reduce electronic waste and the demand for new materials. In fact, repairing your device can save up to 80 percent of the carbon footprint compared to buying a new phone.
Financially, replacing your battery keeps your device running efficiently for a fraction of the cost of a new iPhone. The right to repair movement is gaining traction in New Zealand, supporting consumer choice and sustainability.
By investing in iphone battery replacement, you are not only saving money but also contributing to a greener future. Make sure to recycle your old battery responsibly at a certified collection point to prevent environmental harm.
Expert Tips for Safe and Successful Battery Replacement
Replacing your iPhone battery can feel daunting, but with the right approach, you can achieve a safe and successful result. Whether you are a seasoned DIYer or tackling iphone battery replacement for the first time, following expert advice helps you avoid common pitfalls and maximise your battery’s potential. Let’s explore essential safety tips, care strategies, troubleshooting steps, and legal considerations every New Zealand user should know.
Avoiding Common Mistakes and Safety Hazards
Safety is the top priority during any iphone battery replacement. Start by working on a flat, fireproof surface and put on safety glasses and an anti-static wrist strap. Always keep metal tools away from battery connectors to prevent short circuits. Never puncture, bend, or force the battery, as this can cause fire or hazardous fumes.
If you notice smoke or swelling, stop immediately and move the device to a safe outdoor location. Newer models, like the iPhone 16, include improved adhesives and debonding methods that make removal safer. For more details on these innovations, see the iPhone 16 Battery Replacement Innovations.
Maximising New Battery Lifespan
To get the most from your iphone battery replacement, calibrate the new battery with a full charge and discharge cycle as recommended by Apple. Avoid exposing your device to extreme temperatures or letting the battery drain completely, as both can reduce long-term capacity.
Always use Apple-certified chargers and cables to ensure safe, efficient charging. By following these steps, you can maintain over 80% capacity for more than 500 cycles, prolonging the life of your replacement battery and ensuring reliable daily performance.
Troubleshooting After Replacement
After completing your iphone battery replacement, run through a quick checklist. Confirm Face ID, Touch ID, and camera functions are working correctly. If you see a “Non-Genuine Battery” warning, it may be due to third-party parts or missed pairing steps. Restart your device and check connections if the phone won’t power on or charges slowly.
If you encounter persistent issues, consult Apple Support or visit community forums for troubleshooting advice. Seeking professional help is wise if you notice rapid battery drain or hardware features not working post-repair.
Legal and Warranty Considerations in New Zealand
Understanding your rights is crucial when performing an iphone battery replacement. Apple’s 2025 warranty covers battery defects for one year or 80% capacity, but DIY repairs may void this protection. If you use a third-party service, check if they offer their own warranty and what it covers.
Under New Zealand consumer law, you are entitled to fair repair options and genuine parts. Always document your repair process with photos and keep receipts, especially if you need to make a warranty claim or return to an authorised service provider.
Comparing DIY, Apple-Authorised, and Third-Party Battery Replacement
Choosing the right iphone battery replacement method can significantly affect both your device’s performance and your peace of mind. Whether you are considering a do-it-yourself approach, an Apple-authorised service, or a trusted third-party repair shop, understanding the differences is crucial for New Zealand users.
Pros and Cons of Each Method
Each iphone battery replacement method comes with unique advantages and drawbacks. Here is a quick comparison:
| Method | Pros | Cons |
|---|---|---|
| DIY | Cost savings, flexibility, quick access | Risk of error, warranty loss, skill required |
| Apple-Authorised | Warranty protection, expert service | Higher cost, longer wait times |
| Third-Party | Lower cost, convenience, local options | Variable quality, possible warranty issues |
DIY kits let you control the process and save money, but mistakes can lead to issues like Face ID failure or display damage. Apple-authorised repair ensures your iphone battery replacement is genuine and covered by warranty, but may involve higher fees and longer turnaround. Third-party shops balance cost and convenience, though quality and warranty implications can vary. When reassembling your device, consider applying iPhone screen protectors to safeguard your screen during and after the process.
How to Choose the Best Option for You
Selecting the ideal iphone battery replacement method depends on several factors:
- Your technical skill and comfort with small electronics
- The age and value of your iPhone
- Whether your device is still under AppleCare or warranty
- How quickly you need the repair completed
- The importance of warranty protection versus saving money
If you are confident with tools and have an out-of-warranty device, DIY may be cost-effective. For newer models, especially those where Face ID and water resistance are concerns, Apple-authorised service is safest. Third-party repair can be a good middle ground for older phones or when time is of the essence.
Real-World Scenarios and Recommendations
Consider these real-world cases to guide your iphone battery replacement decision:
- An iPhone 14 Pro user chose Apple service due to anxiety about Face ID issues, valuing official support over savings.
- A savvy iPhone 13 owner used a DIY kit, successfully saving $49 and keeping their device running smoothly.
- For those upgrading to the latest models, protecting your investment after battery replacement is wise. Browse iPhone 16 series cases to keep your device safe post-repair.
In summary, weigh your priorities: cost, convenience, warranty, and device age. Sometimes, upgrading makes more sense if your iPhone is several years old or showing additional signs of wear.
Maintaining Battery Health After Replacement
Replacing your iPhone battery is just the beginning. To ensure the longevity of your device and maximise the value of your iphone battery replacement, it is important to adopt smart maintenance habits and know when to seek help.
Daily Habits for Long-Lasting Battery Performance
After an iphone battery replacement, daily habits play a crucial role in keeping your battery healthy. Always keep your iOS updated to benefit from the latest battery optimisations. Avoid leaving your device plugged in overnight, which can stress the battery over time.
Try not to expose your iPhone to extreme temperatures. Charging in very hot or cold environments can reduce battery performance. Use iOS 18’s battery health tools to monitor your battery condition regularly.
If you have just replaced your battery, consider adding protection to your device. For those with an iPhone 13 Pro, browsing quality iPhone 13 Pro cases can help safeguard your phone from accidental drops after repair.
Simple changes, like unplugging your charger once you reach 100 percent and avoiding deep discharges, can extend your battery’s lifespan. Many users report gaining an extra 18 months of reliable use with proper care.
When to Seek Professional Support Again
Even after a successful iphone battery replacement, ongoing vigilance is important. Watch for signs like rapid battery drain, swelling, or your device shutting down unexpectedly. These indicate your battery may be failing again, or another internal issue may be present.
If you notice these symptoms, contact Apple or a trusted third-party repair provider in New Zealand. Professional support is also recommended if you encounter persistent charging issues or your phone will not power on after replacement.
When disposing of your old battery, recycle it at an authorised facility or follow guides, such as those from iFixit, to ensure safe and eco-friendly disposal. Proper recycling prevents toxic waste and supports sustainability.
Future-Proofing Your iPhone for 2026 and Beyond
After an iphone battery replacement, think ahead to keep your device performing well in the future. Stay aware of new battery technologies and software updates, as these can further optimise your phone’s efficiency.
Consider upgrading your charging accessories, like adopting MagSafe or USB-C, to ensure fast and safe charging. Regularly check battery health in iOS and plan for future repairs as your device ages.
By maintaining good habits now, you can extend the life of your iPhone and be prepared for future advancements, keeping your investment secure for years to come.